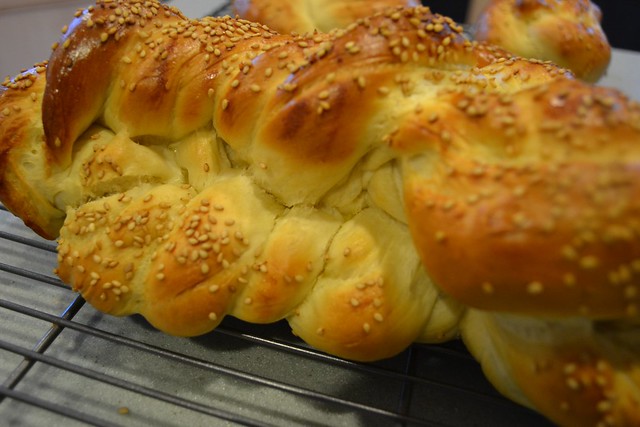
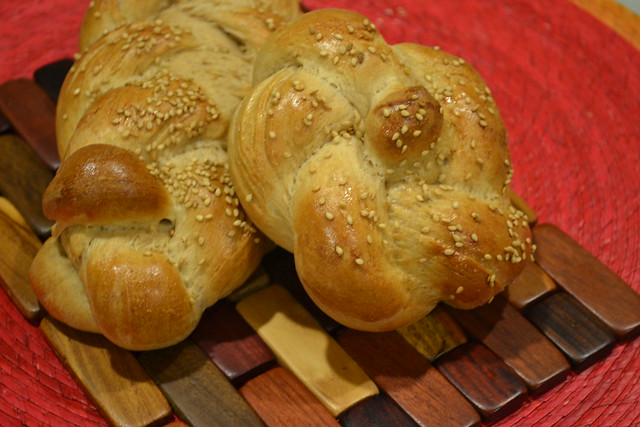
I love things that are crusty. No, not THAT kind of crusty. The good kind, the bread kind. Where the dough is soft and lovely on the inside but has a nice brown color and just a bit of crumb to it. With challah, that's a tough animal. The eggs and the oil make our breads dense and sweaty. Combined with the (required, in my opinion) drizzle after egg-washing.
Well, here's a little trick I found out completely accidentally that I've done for the past three weeks since.
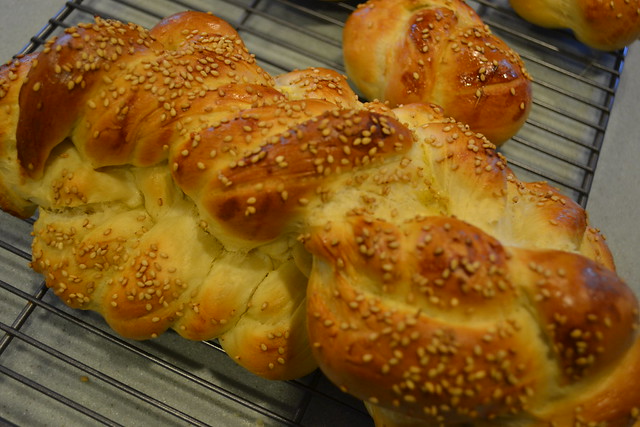
For a slightly crustier challah, set your oven to 375. Put challah in for 5 minutes then turn down to the usual 350. (I know some people bake their challah higher, so just try 15 or so to start). Bake 10 minutes and then turn the loaf pan 180 degrees in the oven. Bake an additional 10-15 minutes depending on what you need.
I did this one Friday afternoon after successive baking of a casserole. Basically, I forgot to turn the oven down. But, the Hazz (and his brother who was in town visiting) declared the loaf to be THE BEST YET.
What tricks have YOU discovered accidentally?
Tuesday, November 29, 2011
Friday, November 25, 2011
Gobble Gobble!
Check out THESE great gobblers...
From Rabbi Phyllis over at Ima on (and off) the Bima made this challah for "Yom sheni shel Thanksgiving." LOVE!
My friend and fellow congregant from our synagogue, Sarah, made this great bird for her family. I LOVE the dough waddle. Definitely doing the dough beak next year like these ladies.
See my Gobbler.
See the original.
Labels:
animal-shaped challah,
challah shape,
holidays,
thanksgiving
Six-Stranded Braid
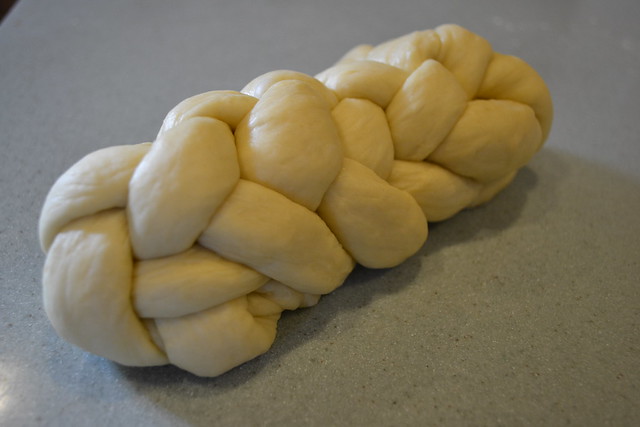
The six-stranded braid, in my opinion, should not be limited to just special occasions. It's so tall, so lovely, and not that hard. If you can do the four-stranded braid, you can do the six, because it's basically the same pattern. While I normally make the five-strand, this sixer turned out so lovely, I want to make them a little more often!
This braid will work best with a basic white flour dough that has nice elasticity but isn't too sticky. Since it's a taller loaf, you might need to foil in the oven to make sure the middle gets cooked and the outside not too dark.
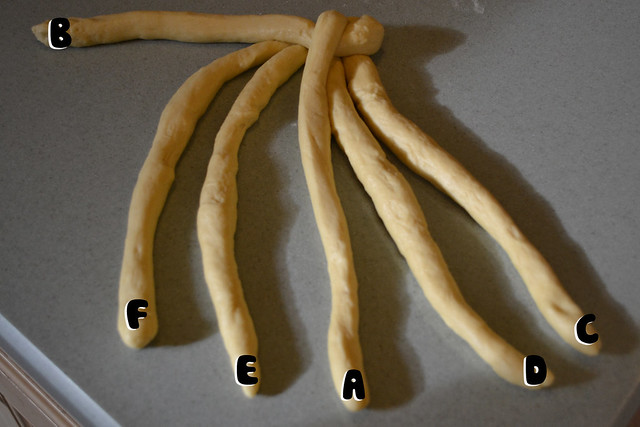
Step One - Start with your six strands all rolled out nicely.
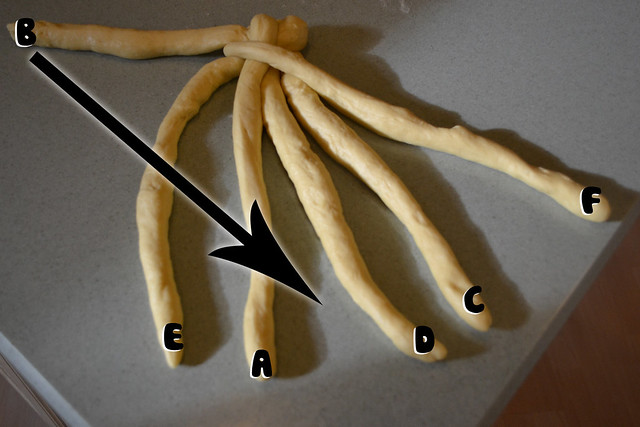
Step Two - Bring the second-to-the-right strand (B) over to the far left.
Step Three - Bring the far right strand (A) to the middle (between E and D).
Step Four - Bring the second-to-the-left strand (F) to the far right.
Step Five - Bring the far left strand to the middle. (Somehow, I missed this step in photos). I'll re-take and update for you!
Step Six - Repeat. Really, it's just two steps from the right. Two steps from the left in mirror. Liberally tuck in the ends. I like a tall short loaf, so I kind of push the whole thing together lengthwise so it's a bit fat.
Now, that wasn't so bad was it? And aren't you proud? It's such a beautiful braid. Shabbat Shalom from our bayit to yours!
Labels:
challah shape,
six-strand
Sunday, November 20, 2011
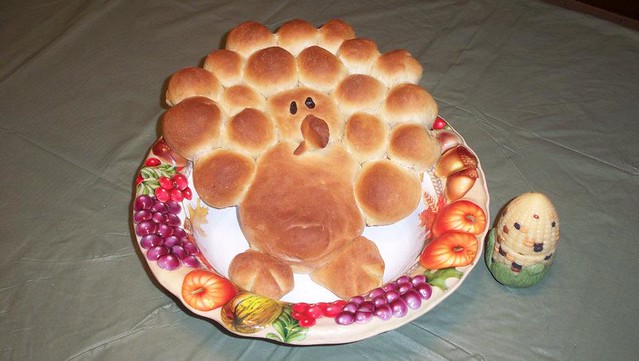
Turkey Challah
Gobble Gobble!
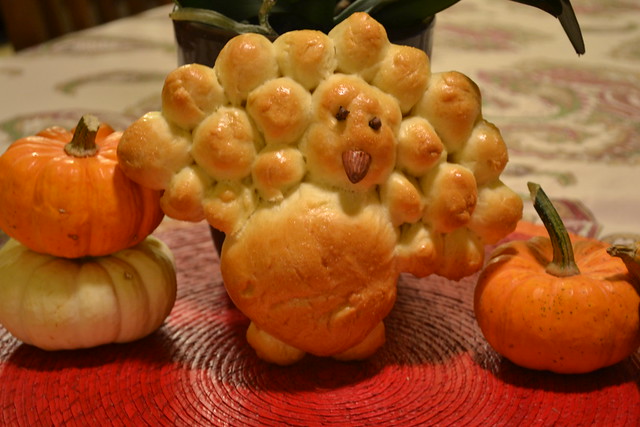
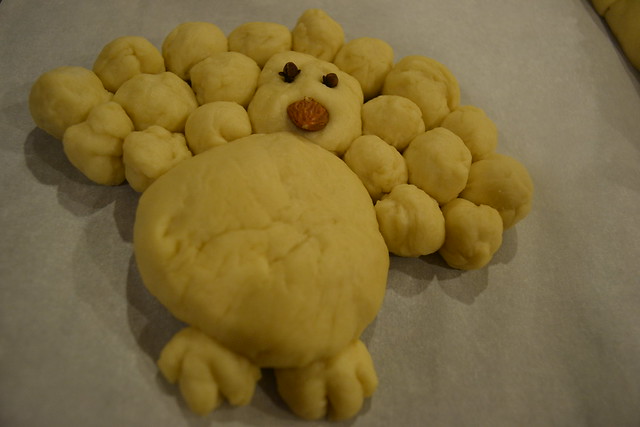
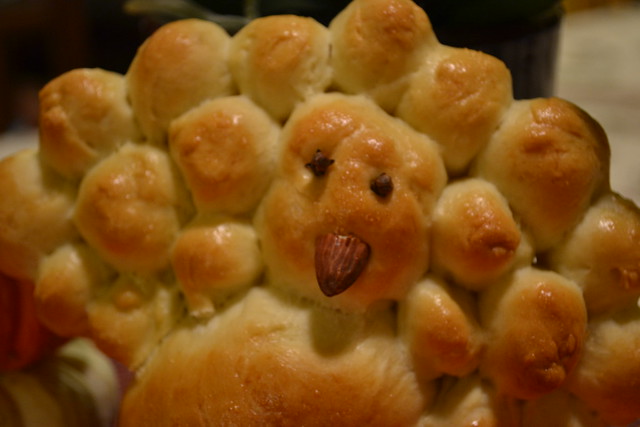
A friend sent me this AWESOME link. I just HAD to make it :) It's very easy. Just start with the body and head. Add some little feet with some scores with a sharp nice. Then just add balls all around fanning out.
Labels:
animal-shaped challah,
challah shape,
holidays,
thanksgiving
Friday, November 18, 2011
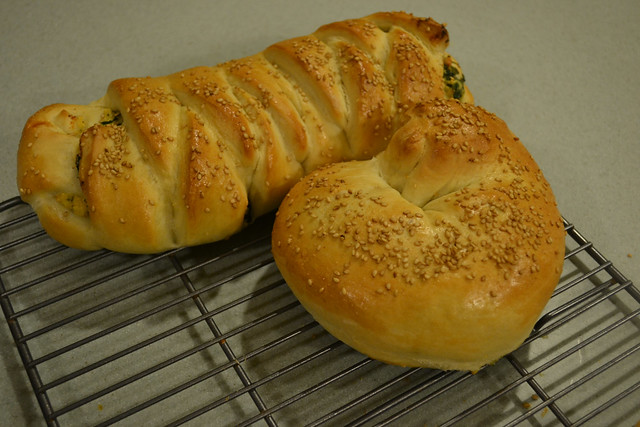
Review: Spinach and Ricotta Stuffed Challah
Friends, Pinterest is a dangerous, dangerous thing. I can spend hours just looking at delicious, darling, hipster, beautiful, amazing recipes, fashion, and home ideas. But I looooove Pinterest.
I pinned this recipe quite some time ago and have been anxious to try it. It's a Spinach and Ricotta Stuffed Challah from the LA Times. However, since I was trying it, and I didn't have a ton of ricotta, I halved the recipe. Then, well into the process, I realized I didn't have any basil. Enter improvisation.
Here are my modifications on the original. While this recipe gives a challah dough recipe, I really think that you can use whatever you want. I just used my own recipe (with fresh yeast because I love it so much).
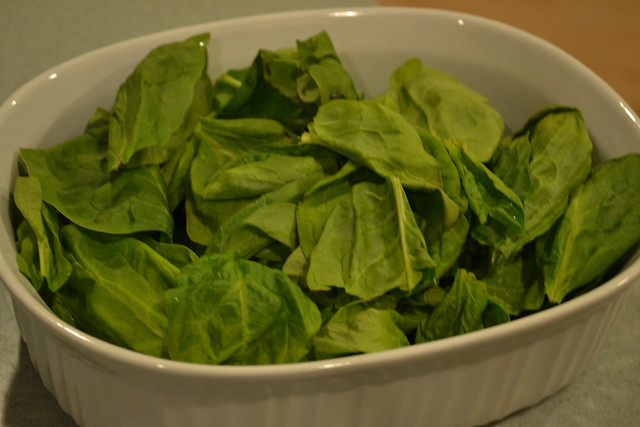
about 3 large handfuls of fresh spinach {the original recipe uses frozen which is easier, but I have a hard time finding it kosher}
1 tbsp fresh chopped oregano
1 tbsp fresh chopped thyme {I still have these herbs from my garden}
2 garlic cloves, pressed
2 heaping tbsp cup pine nuts, toasted in a dry frying pan
1 cups ricotta cheese
2 heaping tbsp cornmeal or flour
Salt and freshly ground black pepper
So, here's the deal. There should also be about 1/4 cup fresh basil, chopped to truly be the original recipe's ricotta/pesto blend. I sprinkled a little dried basil but a REALLY little bit and that flavor didn't come through.
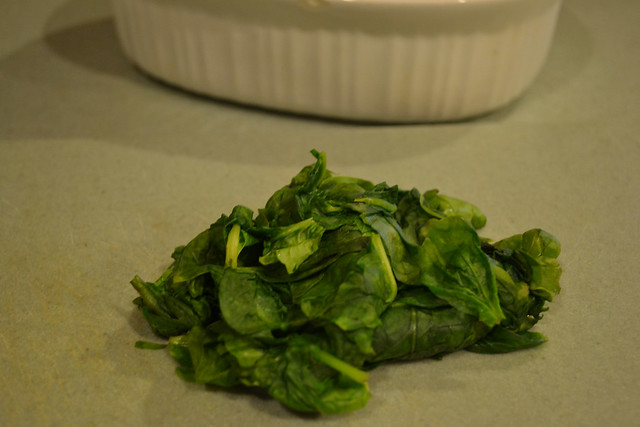
For the spinach, I just put all the leaves in a microwave safe bowl with a bit of water and let them go on high for about 1 minute, checking periodically after 45 seconds. After they were cool enough to handle, I squeeze the water out and chopped.
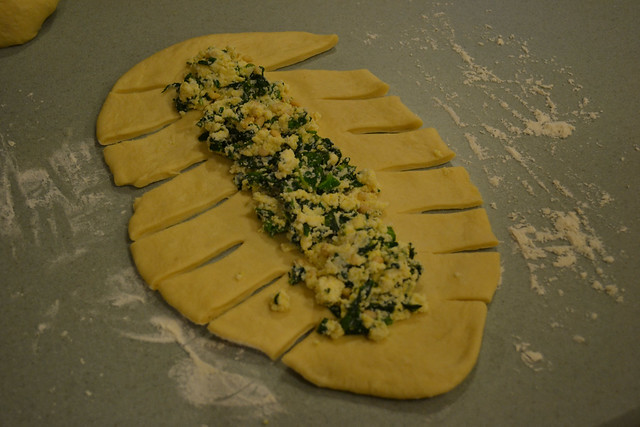
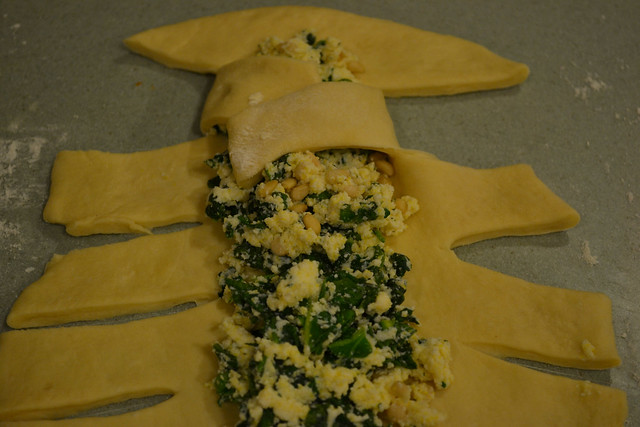
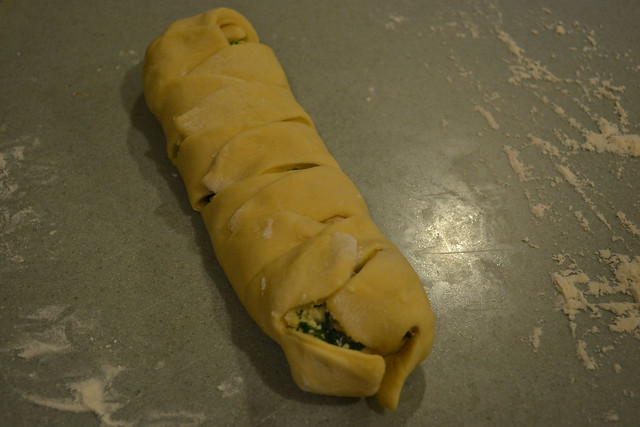
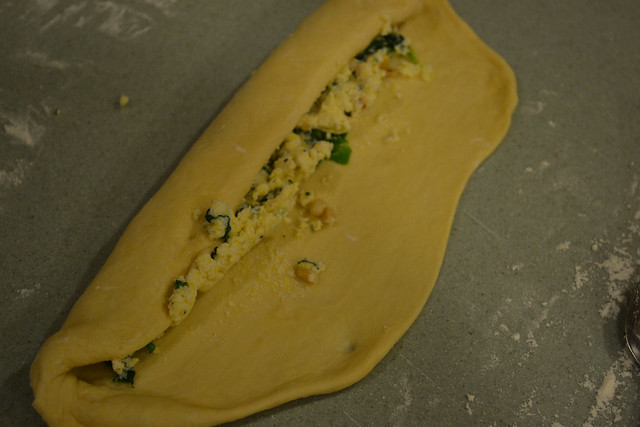
The linked recipe doesn't show you how to do the filled braid, but I've seen tutorials elsewhere. Here's how I did it. Make sure to tuck in those ends!
You could also do a filled challah, which is one of our favorite methods.
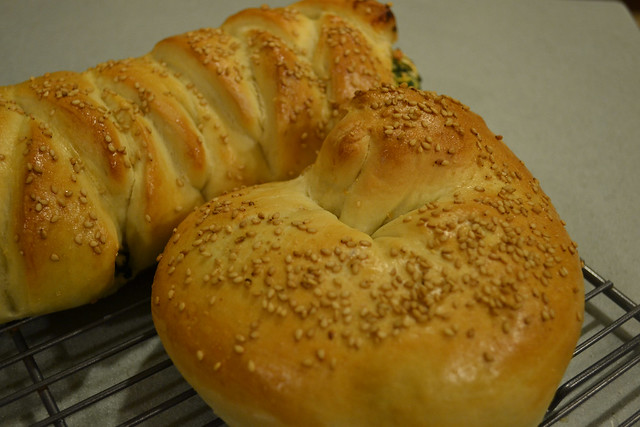
The Verdict: It's okay. I made this is as a Tuesday experiment, and we decided that on Thursday it tasted it's best. The flavors had kind of mellowed out. But, really, it's just okay. The ricotta is salty so the whole thing is a bit aggressive. I think I prefer mozzarella or parmesan in my challah if I'm doing a savory, cheese-y loaf.
That said, it was a fun experiment, and I do like the "braiding" technique.
Labels:
cheese,
dairy,
herbs,
milchig,
not my recipe,
ricotta,
spinach,
vegetables
Friday, November 11, 2011
11-Strand Challah
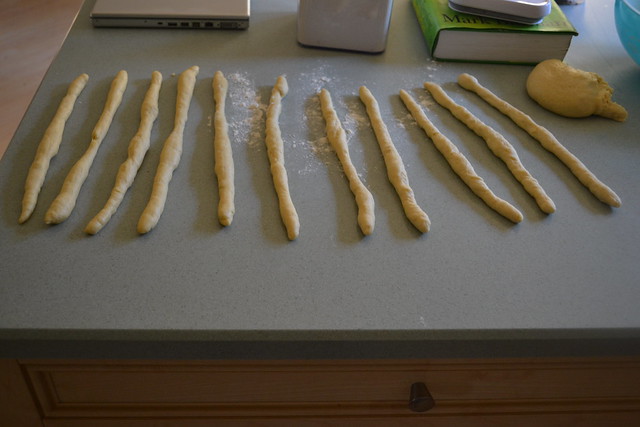
So, it's 11.11.11. Which is pretty cool. So, I decided to make an 11 strand challah. First I rolled out 11 strands.
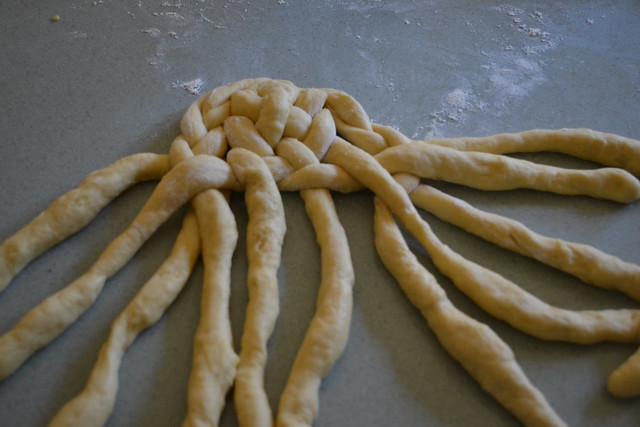
Then I tried to weave it all together. It look impressive, but it was completely random.
<
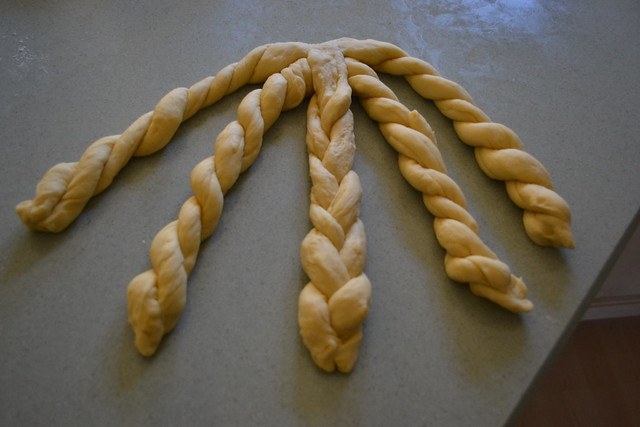
I failed. I got about halfway down and go confused and the whole thing started coming apart. I balled it up. I almost gave up. Then I said, "EUREKA!"
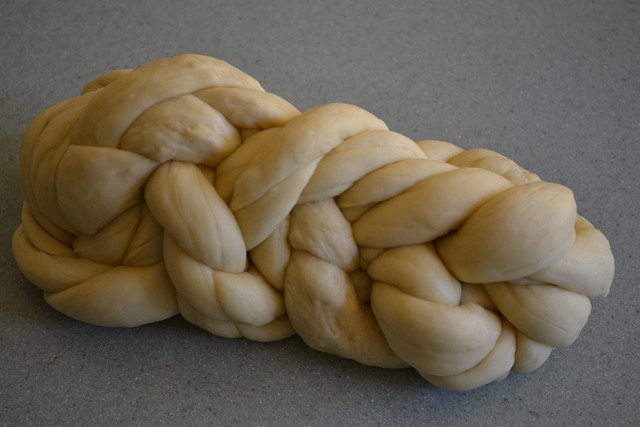
Then I made a 5-braid. It looks, sort of okay. Kinda wonky. But, it is 11-strands. Just because I could.
Shabbat Shalom!
Thursday, November 10, 2011
Black Forest Challah with chocolate and cherries
I'm really excited about this challah. We dreamt it up when naming flavors from our favorite frozen custard place, Kopps. (On a complete side note, if you've never had frozen custard, oh me oh my, so wonderful!) Anyway, The Hazz and I named off several great flavors that would make stellar challot. They're all in the plans. Here's the first installment...
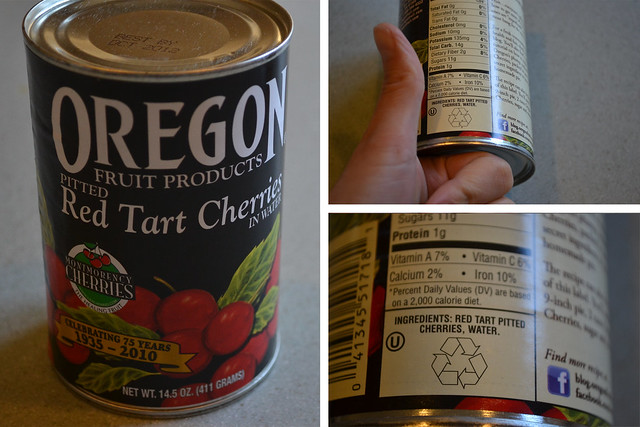
The first challenge in this baby... CHERRIES! I ammorally opposed grossed out terrified against things like high fructose corn syrup and Red Dye #40. Apparently high fructose corn syrup and Red Dye #40 are well, the thing that make Maraschino cherries, well Maraschino cherries. Since we've been on a real kick to get rid of all that kind of stuff in our lives, I went on search for dye-free, corn syrup free cherries. Apparently, they're very hard to find! Finally, SUCCESS!
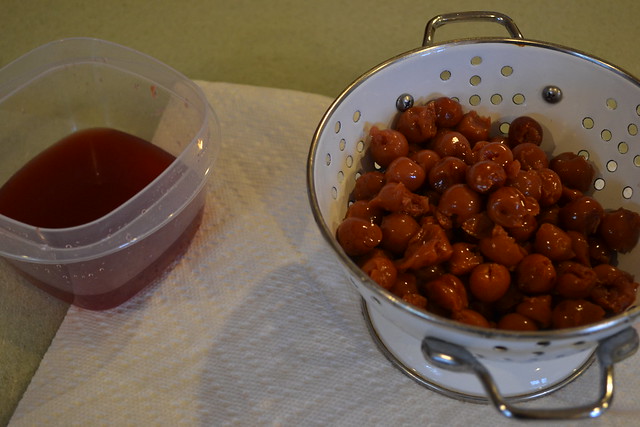
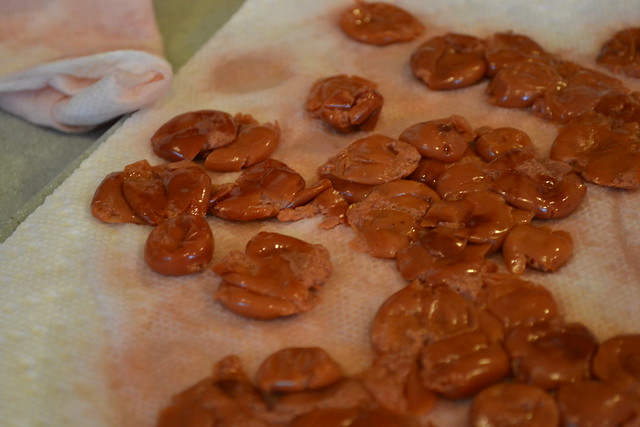
And, while they're not quite as RED as dyed cherries, they're red enough. Note, however, that these babies are SOUR. I taste them. They WERE sour. Here's where a little improvisation came in. First, I removed the cherries from their water. I saved the water, but ended up not using it. Next, I place about 1/2 the cherries on a paper towel-covered cutting board. Then, I squashed them with a paper towel.
Then, I squashed them again. And again. When they seemed pretty dry, I felt ready to proceed. I figured there were two ways we could make this Black Forest Challah. The old Nutella-filled strand stand-by. And, the knead-in method a la Apple Challah.
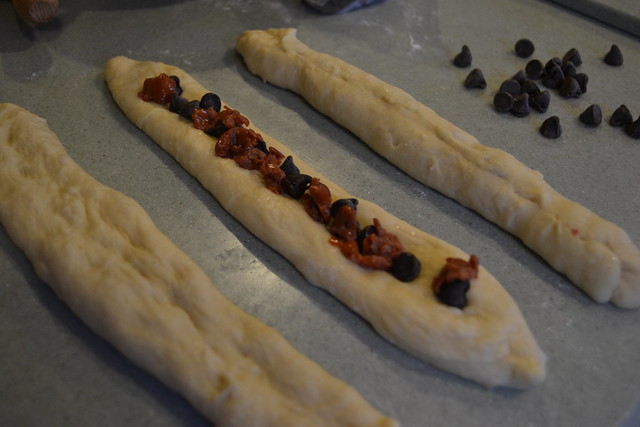
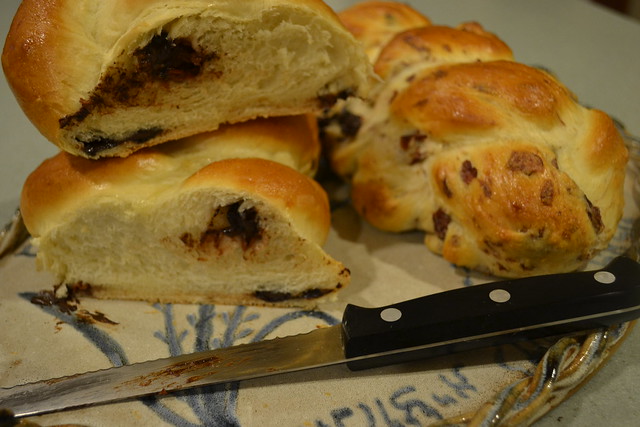
Filled Strands... to fill the strands, I first chopped up the cherries at least in half. Then, I added 2 tbsp of white sugar to the 1/2 can of cherries. I then rolled and stretched three strands. Using my fingers, I made a little trench in the challah and added chocolate chips and cherries, pinching them together with my fingers. Here's the 1-2-3...
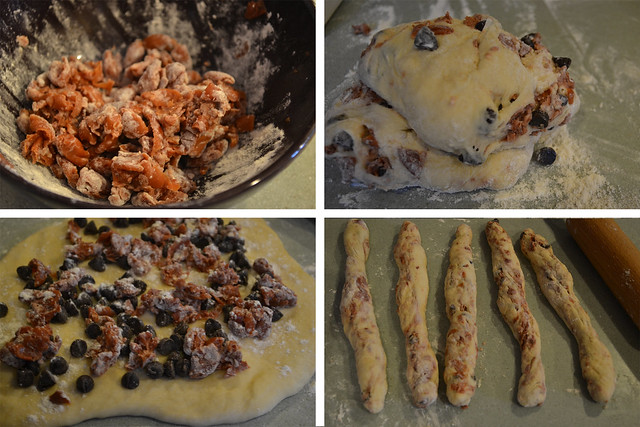
Fully-Integrated Cherries and Chocolate... I learned my lesson on Rosh Hashanah with apples. They add A LOT of liquid to the dough. My dough itself was pretty droopy that day anyway for some reason. So, to counteract, I started by adding about 2 tbsp flour and 2 tbsp of sugar to the rest of the cherries. Then, I just mixed it all together and kneaded... adding LOTS of flour as needed.
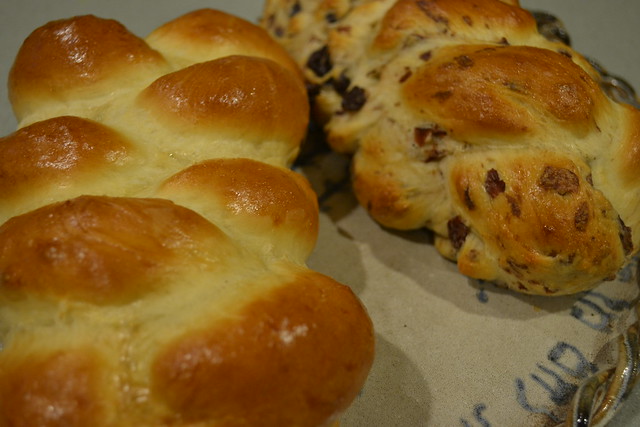
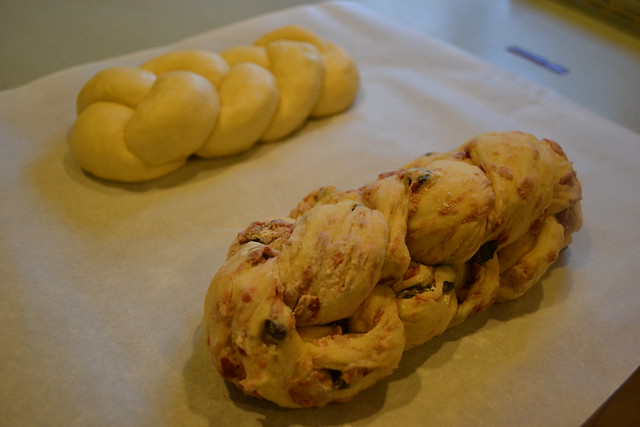
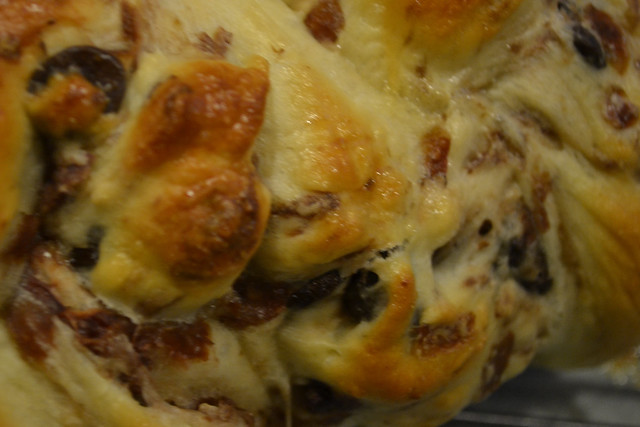
Bake and egg-wash as normal. I was so happy the result. Sweet, but not too sweet. Tart but not too tart. And the chocolate is heavenly. I was definitely much more happy with the integrated challah. The filled version is great and significantly easier to do, but the integrated version is really spectacular.
Guten Apetit!
What ice cream flavors would YOU like to see in a challah?
Schwarzwälder Kirschtorte. Black Forest Cake. Or should I say, Schwarzwälder Kirschbrot (that's German 101 for you)! Here's the Wiki definition of Black Forest Cake. Typically, Black Forest cake consists of several layers of chocolate cake, with whipped cream and cherries between each layer. Then the cake is decorated with additional whipped cream, maraschino cherries, and chocolate shavings. {Source}Wiki goes on to talk about booze in the cake. Kirschwasser, rum, etc. I think booze has a place in challah. I just haven't figure it all out yet. Perhaps another day! Also, we haven't quite figured out how to whip-cream-ize our challah. So... for this challah, I stuck with just chocolate and cherries.
The first challenge in this baby... CHERRIES! I am
And, while they're not quite as RED as dyed cherries, they're red enough. Note, however, that these babies are SOUR. I taste them. They WERE sour. Here's where a little improvisation came in. First, I removed the cherries from their water. I saved the water, but ended up not using it. Next, I place about 1/2 the cherries on a paper towel-covered cutting board. Then, I squashed them with a paper towel.
Filled Strands... to fill the strands, I first chopped up the cherries at least in half. Then, I added 2 tbsp of white sugar to the 1/2 can of cherries. I then rolled and stretched three strands. Using my fingers, I made a little trench in the challah and added chocolate chips and cherries, pinching them together with my fingers. Here's the 1-2-3...
Fully-Integrated Cherries and Chocolate... I learned my lesson on Rosh Hashanah with apples. They add A LOT of liquid to the dough. My dough itself was pretty droopy that day anyway for some reason. So, to counteract, I started by adding about 2 tbsp flour and 2 tbsp of sugar to the rest of the cherries. Then, I just mixed it all together and kneaded... adding LOTS of flour as needed.
Bake and egg-wash as normal. I was so happy the result. Sweet, but not too sweet. Tart but not too tart. And the chocolate is heavenly. I was definitely much more happy with the integrated challah. The filled version is great and significantly easier to do, but the integrated version is really spectacular.
What ice cream flavors would YOU like to see in a challah?
Friday, November 4, 2011
Sprouted Wheat Challah with Milk & Honey
I'm pretty excited about this challah. It's a start on a venture I've been really looking forward to which is really tweaking with recipes as opposed to just doing delicious add-ins (which I love... and I have a few great ones planned for the next few weeks!).
Back in September, I made a big order from King Arthur Flour that included Sprouted Wheat Flour. Here's what KAF says about the product:
As I did with Spelt Challah and Kamut Challah, I wanted to do my homework about this grain before I really got going with the baking. I knew (because I read it on the label) that sprouted wheat is high in protein but what else? The more I read, the more I realized how great it is... high in B6, niacin, and lower on the glycemic index. Nice! Plus, they say it has a nice, sweet flavor. Score! I told myself. Then, I read how it can be really difficult to work with. Trying to remain unfazed, I saw a few suggestions about using milk instead of water to proof the yeast... I did a bit of experimenting and here's what I came up with...
3/4 c milk (I used skim because it's what I had, but other recipes suggested whole)
.6 oz fresh yeast or 2 1/2 tsp active dry yeast
1 1/2 tbsp honey plus drizzling
2 eggs plus 1 for wash
1/4 c canola oil or other neutral oil
1 1/2 c bread flour
1 1/2 c sprouted wheat flour
1 1/4 tsp salt
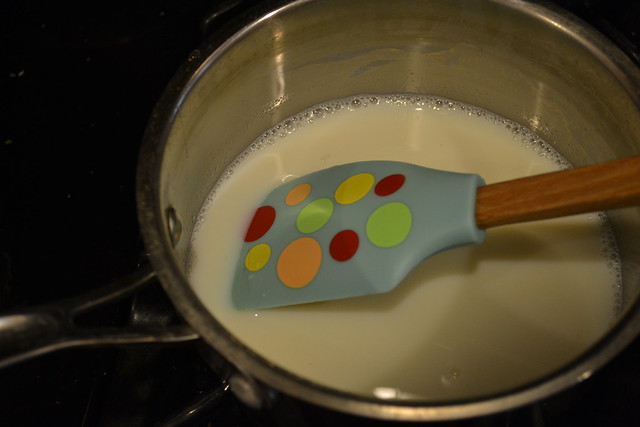
In a small sauce pan, mix together the milk and 1 1/2 tbsp honey. Warm to about 100 degrees, stirring constantly, until the the honey has dissolved. When I proof yeast in water, I just turn my hot water faucet on for a bit and use water right out of the faucet, so the 100 degree thing is really a guess... I just stick my finger in it to check if it is hot enough and that's what I did with the milk. Add the yeast, stir gently, and let rest for about 10 minutes or until foamy.
Proceed as normal. Add the eggs and oil and mix with a wooden spoon or spatula. I usually just dump the flourin next and then sprinkle in the salt. Coincidentally, I recently learned (the hard way) that salt kills yeast. The purists will tell you to premix the salt and flour together. But, I just dump the flour in a put little spoonfuls of salt on top.
During the mixing process, I added a healthy additional squeeze from the honey bottle. Add a little bread flour and/or water as needed and knead with stand mixer or by hand until a ball forms. Have no fear if it's a heavy, heavy dough. Mine was, and my experience is that most whole wheats are. Don't worry, the end result is worth it!
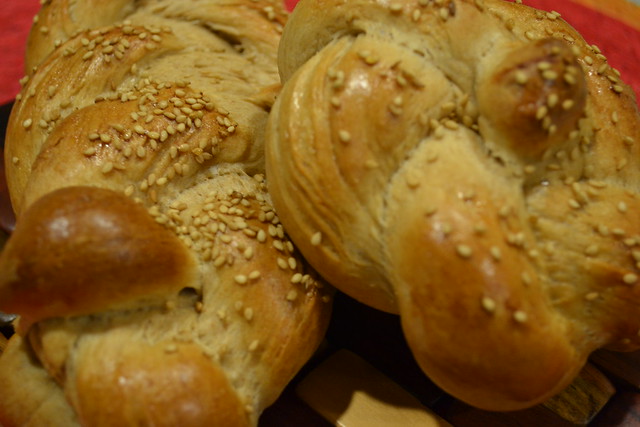
Let dough rest in an oiled bowl (covered) until doubled in bulk, about 1 1/2 hours. You can punch down and let rise again or skip it. I usually don't. Braid as normal. Since this dough isn't very stretchy, I just did a 3-strand braid and some little rolls. Let rest additional 3 minutes. Egg wash and drizzle with honey and your favorite toppings such as sesame or poppy seeds. Bake at 350 for 25-30 minutes.
Shabbat Shalom from our bayit to yours!
Back in September, I made a big order from King Arthur Flour that included Sprouted Wheat Flour. Here's what KAF says about the product:
Sprouted wheat is the best way to access the grain’s nutritional benefits. As the wheat berry grows, vitamins are formed that greatly enhance the nutrition and digestibility of the wheat. Sprouted berries are dried, then ground into flour.I was surprised that it's not actually a KAF product. The flour comes from Lindley Mills, an organic speciality flour mill located in piedmont North Carolina at the site of the 1755 water mill built by Pennsylvania Quaker and settler Thomas Lindley.
As I did with Spelt Challah and Kamut Challah, I wanted to do my homework about this grain before I really got going with the baking. I knew (because I read it on the label) that sprouted wheat is high in protein but what else? The more I read, the more I realized how great it is... high in B6, niacin, and lower on the glycemic index. Nice! Plus, they say it has a nice, sweet flavor. Score! I told myself. Then, I read how it can be really difficult to work with. Trying to remain unfazed, I saw a few suggestions about using milk instead of water to proof the yeast... I did a bit of experimenting and here's what I came up with...
3/4 c milk (I used skim because it's what I had, but other recipes suggested whole)
.6 oz fresh yeast or 2 1/2 tsp active dry yeast
1 1/2 tbsp honey plus drizzling
2 eggs plus 1 for wash
1/4 c canola oil or other neutral oil
1 1/2 c bread flour
1 1/2 c sprouted wheat flour
1 1/4 tsp salt
In a small sauce pan, mix together the milk and 1 1/2 tbsp honey. Warm to about 100 degrees, stirring constantly, until the the honey has dissolved. When I proof yeast in water, I just turn my hot water faucet on for a bit and use water right out of the faucet, so the 100 degree thing is really a guess... I just stick my finger in it to check if it is hot enough and that's what I did with the milk. Add the yeast, stir gently, and let rest for about 10 minutes or until foamy.
Proceed as normal. Add the eggs and oil and mix with a wooden spoon or spatula. I usually just dump the flourin next and then sprinkle in the salt. Coincidentally, I recently learned (the hard way) that salt kills yeast. The purists will tell you to premix the salt and flour together. But, I just dump the flour in a put little spoonfuls of salt on top.
During the mixing process, I added a healthy additional squeeze from the honey bottle. Add a little bread flour and/or water as needed and knead with stand mixer or by hand until a ball forms. Have no fear if it's a heavy, heavy dough. Mine was, and my experience is that most whole wheats are. Don't worry, the end result is worth it!
Let dough rest in an oiled bowl (covered) until doubled in bulk, about 1 1/2 hours. You can punch down and let rise again or skip it. I usually don't. Braid as normal. Since this dough isn't very stretchy, I just did a 3-strand braid and some little rolls. Let rest additional 3 minutes. Egg wash and drizzle with honey and your favorite toppings such as sesame or poppy seeds. Bake at 350 for 25-30 minutes.
Shabbat Shalom from our bayit to yours!
Labels:
dairy,
exotic grains,
milchig,
milk,
sprouted wheat,
whole wheat
Subscribe to:
Posts (Atom)