Showing posts with label chanukah. Show all posts

Friday, December 23, 2011

Sufganiyot (Hanukkah Doughnuts)

Last week, I shared with you Sufganiyah Challah, a guest post from the awesome Leigh Ann.  Well, you're in luck today, haverim, because I'm just going to give you my sufganiyah recipe.
sufganiyot_11
Now, in the interest of full journalistic integrity, this is my first Hanukkah making sufganiyot... and I love it!  Well, I don't love the smell of oil lingering in my hair.  But I love making them!  They're such fun little pockets of sugary, oily deliciousness.

I did a little research (both in person and online) about brachot for sufganiyot.  Apparently, there is some argument in the Talmud that any thick dough (not runny) should have hamotzi even if it is fried rather than baked.  It is a bit weird to my rational side to say mezonot on a yeasty sufganiyah when the dough was actually really, really close to challah dough.  I'd love anyone's thoughts on this :)  Anyway, here's the recipe already; I've yacked enough...

sufganiyot_12 1/2 tsp active dry yeast or .6 ounces (1/3 cake) fresh yeast (I used fresh)
1/4 c warm water
2 eggs
1 1/2 c orange juice (take out of the fridge a little early, like while the yeast is proofing)
3/4 c sugar plus more for dusting
1/2 tsp salt
6 tbsp margarine (softened in the microwave)
5 c all-purpose flour
oil for frying (I used canola because it's what I had)
jam/jelly

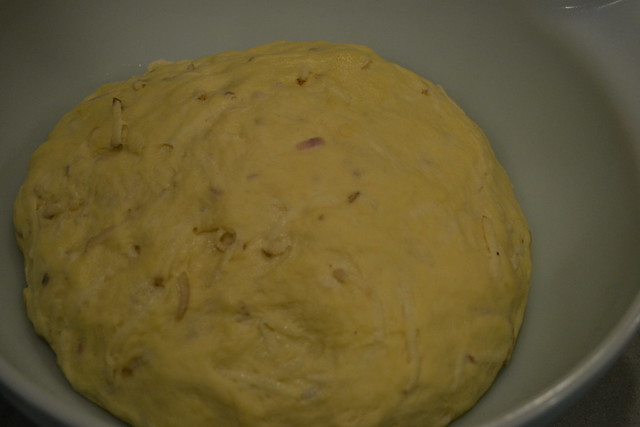
Mix together the water and the yeast with a pinch of sugar.  Let proof until foamy, about 10 minutes.  Add the eggs.  Add a little of the flour and the orange juice and margarine (I add the flour to prevent any curdling and buy some time).  Add the rest of the flour, salt, and sugar.  Mix by hand or with a stand mixer until a ball forms.  It will be a little tackier than challah but should not be sticky.

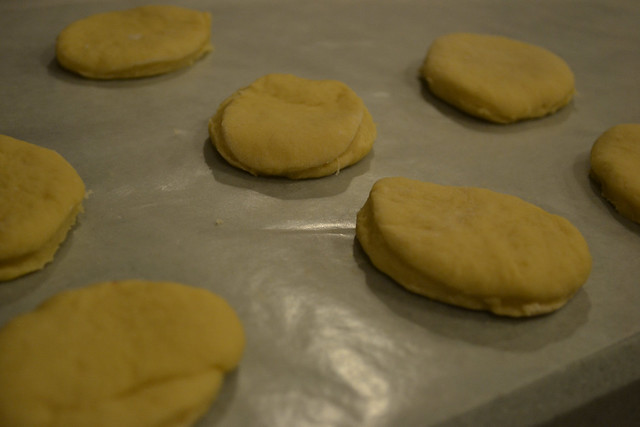
Let rest until doubled close to bulk (I didn't let mine completely double) in an oiled bowl covered in plastic wrap.

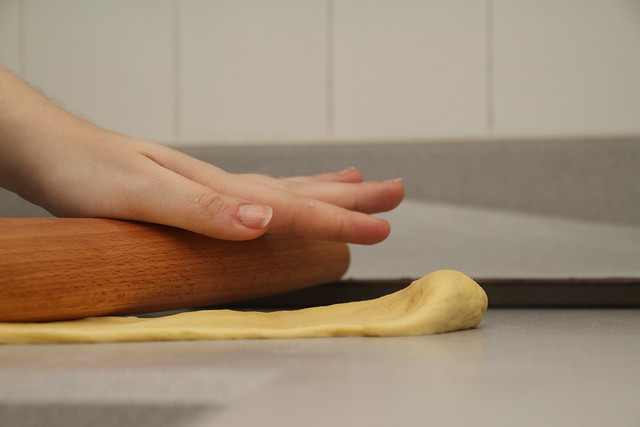
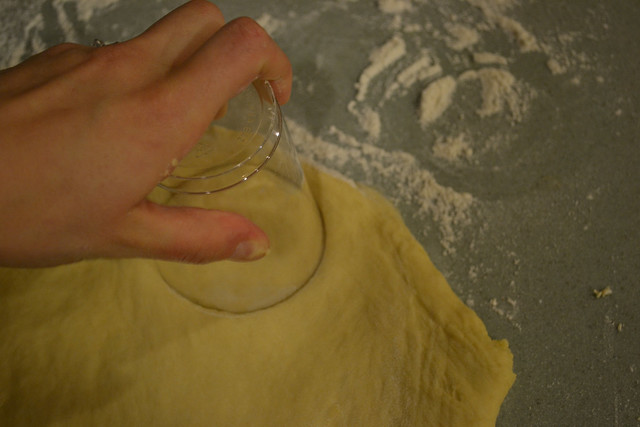
Roll out the dough to a little less than a 1/2 inch thick.  Using a cookie cutter, biscuit cutter, or (if you're like me) a sturdy edged disposable cup you filched from your synagogue somewhere, cut into circles.  Place on wax or parchment paper and let rest about 1/2 hour.  Yield should be about 3 or 3 1/2 dozen. (YIKES!)
sufganiyot_2 sufganiyot_4

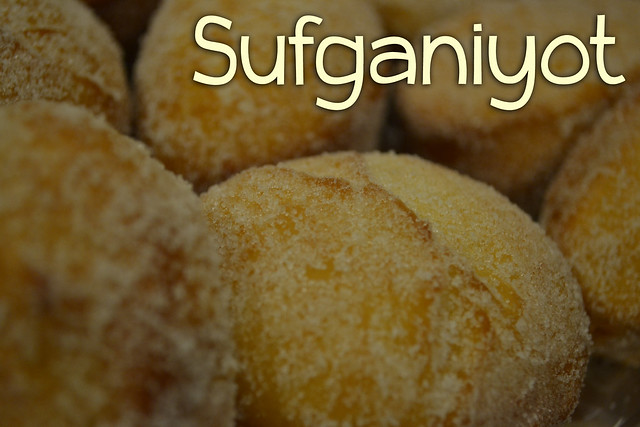
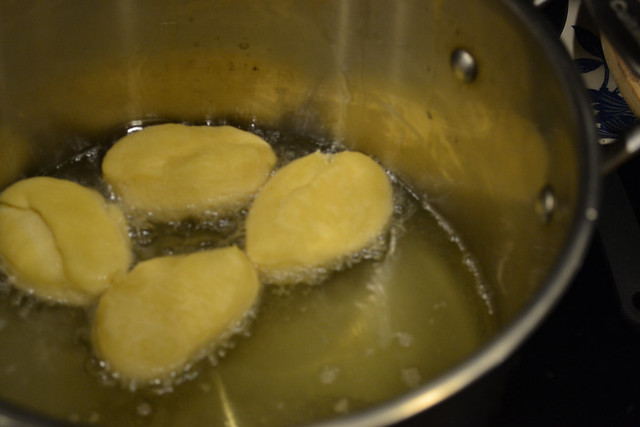
Heat 2-3 inches of oil in stock pot.  This is the hardest part for me, and maybe you should read some other instructions before listening to me.  I ALWAYS put the little buggers in too early.  Be patient.  Take your ugliest circle first to test the oil.  When the oil is truly hot but not spitting, fry until golden brown on both sides.
sufganiyot_6 sufganiyot_9

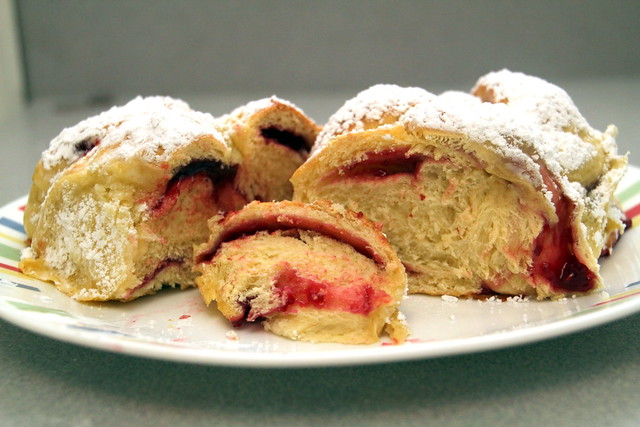
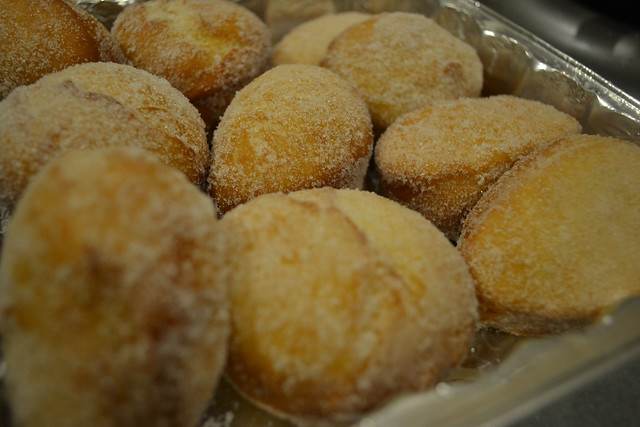
After dropping in your next batch, sugar those puppies with a bit more sugar (some people use powdered).
sufganiyot_12
I've read that you can actually fill sufganiyot before frying, but I didn't try that.  I used a hair coloring solution bottle (a new one!) to fill mine, but a (new!) medicine syringe or special pastry tool would probably work better.  I was being resourceful.
sufganiyot_14


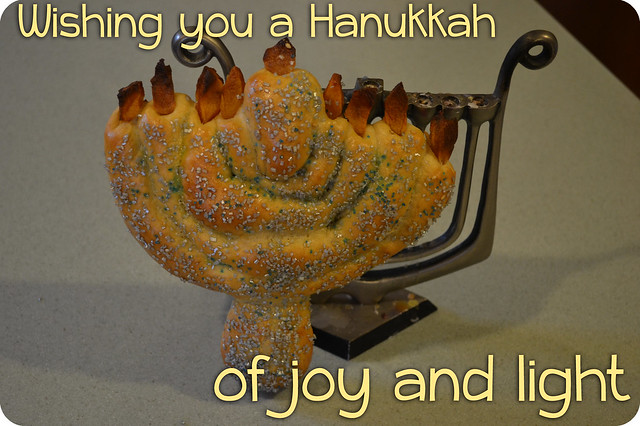
A happy, healthy, and bright Hanukkah to you from our bayit to yours!

Sunday, December 18, 2011

Guest Post: Sufganiyah Challah

hanukkah2This is a guest post from Leigh Ann, one of my favorite ladies and an awesome rabbi, author, blogger, mom of almost 4, and overall great woman (in no particular order).  You can find her over at The Naptime Novelist or reader her other guest post here, Blueberry Challah.


Thanks for letting me guest-post, Amanda! Delighted to be here.

I love filled challah because I can call it "breakfast" on Shabbos morning, when the last thing I want to do is trudge into the kitchen to get cereal or bagels or muffins for my apparently STARVING children.

On Friday night, I just throw one of these suckers on the coffee table in the living room, so that immediately upon waking, my littles can fall upon this breakfast like the vultures zombies Shabbos sweeties they are.

Ahem.

It occurred to me that I should probably start thinking about Chanukah-themed challah, because, well, that's how I roll. I spied a can of raspberry pastry filling in my cupboard leftover from Hamantaschen-making, and sufganiyah-style challah was born.

Use your regular challah dough recipe. You might want to make it a tad sweeter, so you can add more sugar...I came across this odd little bottle of flavoring, added 2 tsp to a regular batch of dough, and it was just a little butterier and sweeter.  (Note from The Mrs.: I used a similar buttery sweet dough enhancer from King Arthur Flour in my Caramel Chocolate Challah.)
IMG_0480

When you're ready to braid, flatten your strands as much as possible. The challah dough is surprisingly tough and elastic, so I've found that rolling strands as usual and then just taking a rolling pin to those suckers
IMG_0477

Brush the whole strand with beaten egg white. Just enough to act as "glue."
IMG_0467

Drag a thin-ish line of filling down the middle - you don't have as much room as you think in there. Trust me.

Pull up the sides and pinch them together. Don't try to fold one side over the other like you would swaddle a baby - this filling is too liquid for that.
IMG_0470
(Yes, I did get some schmutzies on my fingers. So what? It's going in the oven.)

As with any stuffed or filled challah, when you braid, try your best to keep the seam on the INSIDE. That way, when (not "if," WHEN) that filling leaks, it'll just leak onto more challah and you won't lose it to the pan. Also it's WAY less ugly with the seam on the inside.
IMG_0472

Now, snug your challot up together in a well-greased, walled pan - I used a 9" square for  two medium-sized challot. Same principle as braiding with seams in - You don't want to lose any of that filling. Better sticky on the outside than crusty-burned onto a pan.

It's okay if there's a gap in the middle - between the second rise and the baking, they'll end up touching.
IMG_0478
(See? They always leak.)

Let it do a second proof and bake it as usual - mine took the same temp and time as a typical challah.

Aaaand.....Here it is!
IMG_0482

Okay, okay, I know. Not so impressive looking, huh? At this rate, you might end up feeding it to the dog (or the squirrels, I understand, if you live in Virginia) at the end of your Chanukah party. Let's pretty it up a little, huh?

Go ahead and brush it with a syrupy-thin mixture of confectioner's sugar and water....
IMG_0497

Dust it with confectioner's sugar, and.....ooooh! Now, THERE's a sufganiyah-style challah.

IMG_0517

Chag Urim Sameach, you guys - and don't forget! When someone compliments you on this challah, it was VERY DIFFICULT to make, and you're completely exhausted, and probably someone else should clean up the kitchen while you take a load off.

Friday, December 16, 2011

Latke Challah

hanukkah2
Haverim! I'm sorry I was absent last week and didn't give you a heads up.  I was staffing a middle school age youth group weekend, and, needless to say, had other things on my mind.  The Hazz made his own challah that, among other things, involved proofing yeast in root beer.  But, more on that another time.  I'm trying to get him to write up the guest post :)

I've been thinking about making a latke challah for a while, and wondering how to do it.  I did find one online discussion of it, but the end result was more everything bagel.  Now, I love my latkes BURNT.  Crispy.  And soft in the middle.  How could I attempt this?  Ultimately, I decided on a pre-baked crispy topping plus potatoes inside the loaf.  Here's the result... LATKE CHALLAH!'

latke6_name
3/4 c hot but not boiling water
2 1/2 tsp active dry yeast
1 tbsp honey
2 eggs plus 1 more for egg wash
scant 1/4 c vegetable oil
3 c flour + about 1 additional cup
1 tsp salt
1/4 tsp garlic powder plus a little more for sprinkling
1 russet potato
1 large shallot or small onion (I used a shallot, because that's what I had)

Proof the yeast in the hot water with the honey. Let rest for about 10 minutes. Meanwhile, use a food processor on the shred setting (you could also do this by hand) on the onion and potato. Don't bother peeling the potato; just wash it :)

The next step is REALLY important. As you probably know from making latkes or kugel, you MUST squeeze out as much water from the potatoes as possible. I usually just use paper towel or a clean flour sack cloth (that then goes straight in the wash!). Mix together the eggs with the about three-quarters of the potato/onion mixture with the salt and the garlic powder. Leave the rest of the potato/onion mixture aside for now.

Mix together this mixture with the yeast. Add the oil and the flour. You will most likely need about a cup more of flour just to get the dough manageable. It will still be a bit sticky. I usually use a stand mixer, but you can always does this by hand. Let rest in an oiled bowl for 1 1/2 to 2 hours or until about doubled in bulk.

While the dough is rising, make the topping. Preheat the oven to 400. Place the rest of the potatoes and onions on a parchment paper covered cookie sheet. I was feeling lazy and just sprayed the whole shebang with some PAM, but you could also just drizzle with a healthier oil (they ARE latkes though). Sprinkle with garlic powder and bake for 10-15 minutes or until beginning to brown. Let cool.
latke3 latke4

Turn down the oven to 350. Braid as normal (I suggest a three-stranded braid). Let rest about 20 minutes. Egg wash. Press (quite hardly) the crisped potato topping into the loaves. Bake at 350 for about 25 minutes, checking halfway and covering with foil if the potato topping gets too brown.

Now, it's no latke. But it has the flavors of latkes. Which are one of the best things ever.
latke7

(An Early) Hag Urim Same'ah to you! May this Hanukkah bring light into your lives!