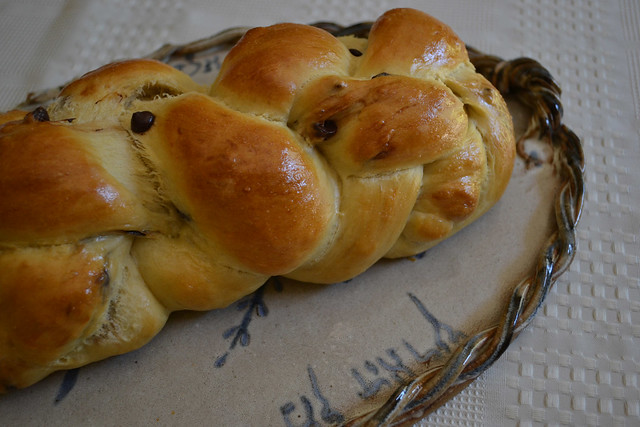
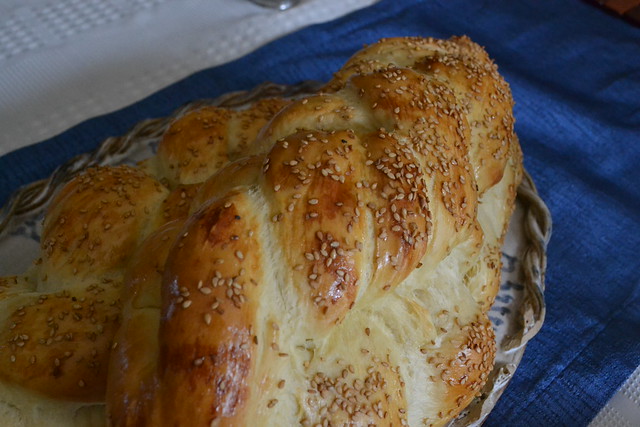
In my opinion, chocolate chips are SUCH a challenge in challah. They should be easy and perfect but they can often either overpower the bread or become burnt little crisps.
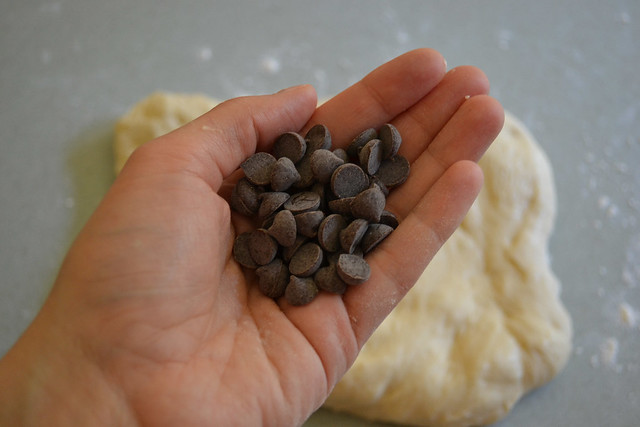
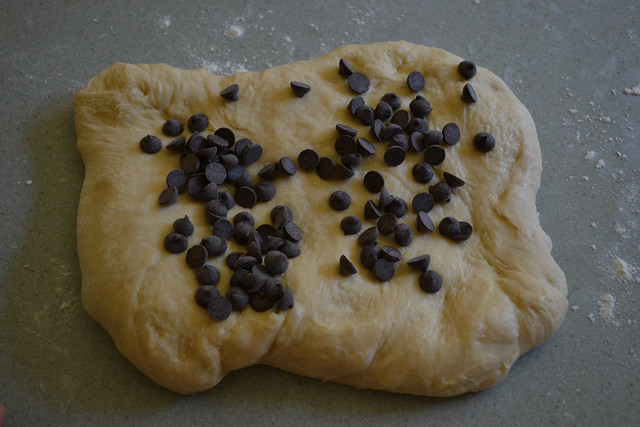
I've mentioned this before, but my solution is to knead in the chips AFTER the rise(s). First, I sort of flatten the bread, as such and drop a bunch of chips on. This is about a quarter of a cup. Knead those in gently and then add more to your liking.
When I separate each strand for braiding, I try to make sure there are no chips on the outside. It's challenging to do, because they want to poke through. I do my best to work them into the center of the dough.
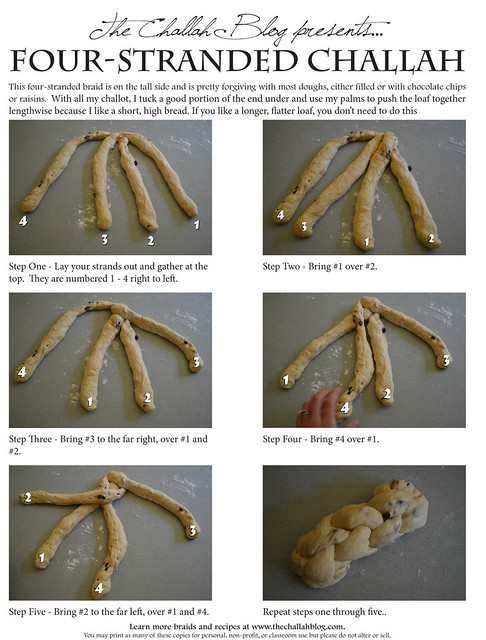
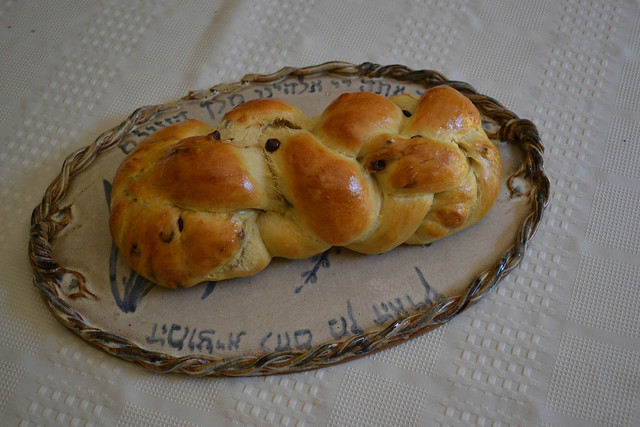
With chips of any kind, I find that fewer strands is best. In filled challot (like
Nutella Challah), I always do three-strands. With the chocolate chips, I opted for a four-strand, which I don't do very often. This is mainly just because I prefer five. But, here's my how-to on four-strand. I learned it from a friend. Five I learned from the internet, so I'll try to dig up the link... if I can't find it, I'll post my own but it's a little hard to photograph!
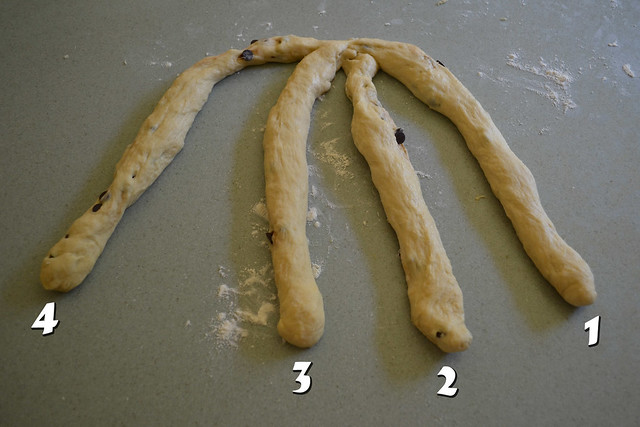
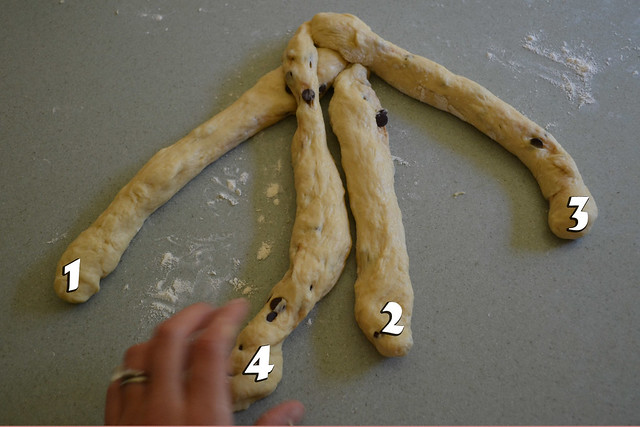
Step One - Lay your strands out and gather at the top. They are numbered 1 - 4 right to left (it's Jewish bread after all).
Step Two - Bring #1 over #2.
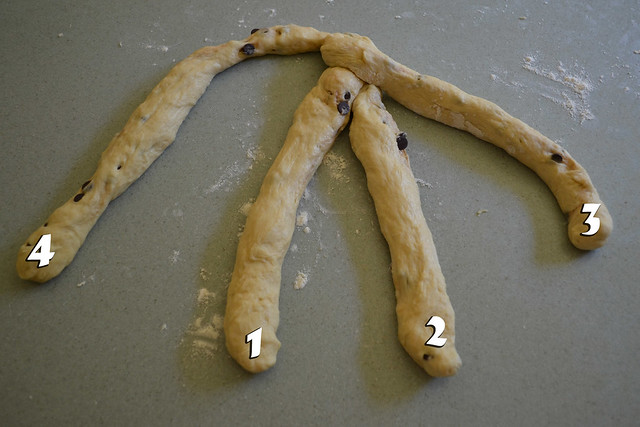
Step Three - Bring #3 to the far right, over #1 and #2.
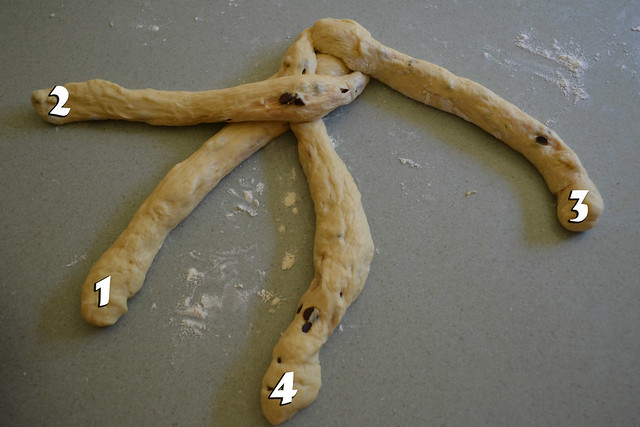
Step Four - Bring #4 over #1. (This blurry hand shot is what I get for trying to braid challah, take a photo, and not get flour on my camera.)
Step Five - Bring #2 to the far left, over #1 and #4.
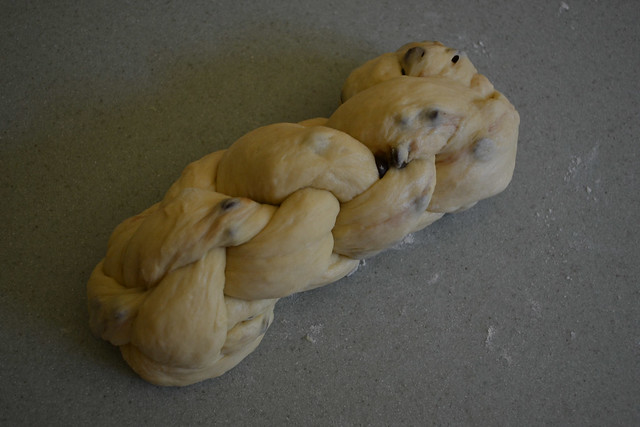
Repeat steps one through five. - With all my challot, I tuck a good portion of the end under and use my palms to push the loaf together lengthwise because I like a short, high bread. If you like a longer, flatter loaf, you don't need to do this.
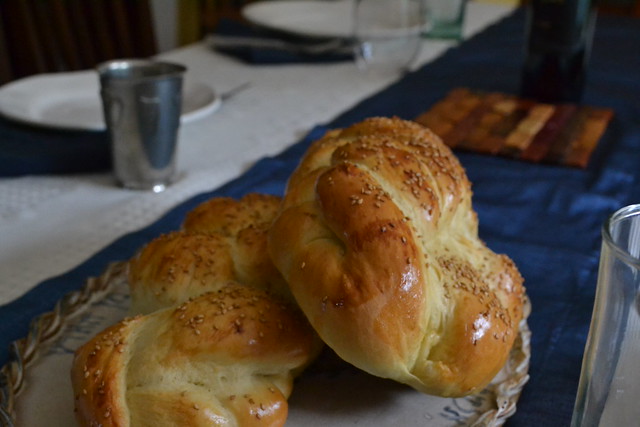
Ta-da! You did it! I love chocolate chip challah, and I'm excited because The Hazz's cousin and her family are coming to visit with two little daughters! Love making kid-friendly dinners (although this week, The Hazz cooked and I just made challah and dessert).
Shabbat Shalom from our bayit to yours!